Peghead Veneer, or My Little Miracle
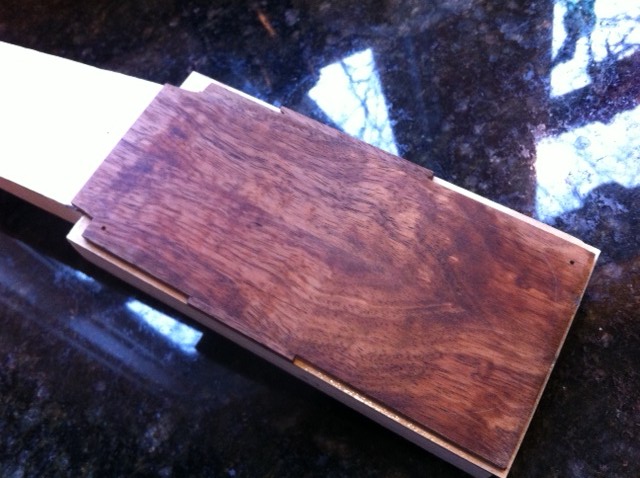
This is a figured Koa pehead veneer/headplate, resawn and bookmatched from an ebay-purchased knife scale blank. The set of ten blanks was intended for the rim cap, but I only needed eight for that and two were good candidates for a headplate. I resawed and glued the bookmatch a while back without documenting at the time, but I remember all my mistakes because I paid for them with anxiety and extra work the rest of the way.
- Resaw fail resulted in two pieces of unequal thickness. This happened with both blanks, with one worse than the other. Note: the blanks were only 3/8" thick. Somehow it barely worked out that the thinnest corner of the thinnest "half" of the blank I most wanted to use was right at the desired 7/64-1/8".
- Clamping fail resulted in the bookmatch bowing up a strong 1/16" in the middle. Somehow it flattened out with very little sanding, though it took a couple nights to do that and try to make it flat. I'm not sure I ever got it perfectly flat, but at some point I had to stop trying. Of course the bow also resulted in a pinched joint, so no matter how good my edges were, one surface would show a glue line. Fortunately the other side had a perfect joint on the surface. Guess which side is facing up now.
- One attempt at thickness sanding involved rigging a fence next to the spindle sander and pushing/pulling the piece through. It worked well except when the piece got stuck and I sanded a nice 3" diameter groove maybe .030" deep into the bottom surface. Somehow this happened in the waste area only and not noticeably in any prime real estate.
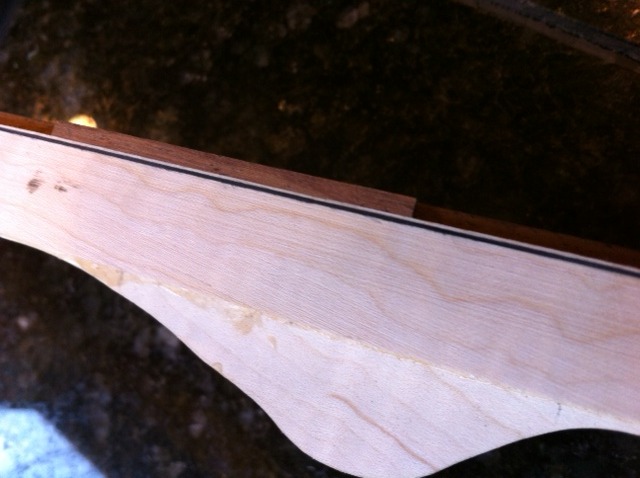
- Unfortunately the overall width was 1/8" short of my pattern width, due to the blank being sized for knife handles and not banjo headplates, so I spent one night gluing little ears to correct that. I'm really hoping for no unsightly glue lines in the side grain there.
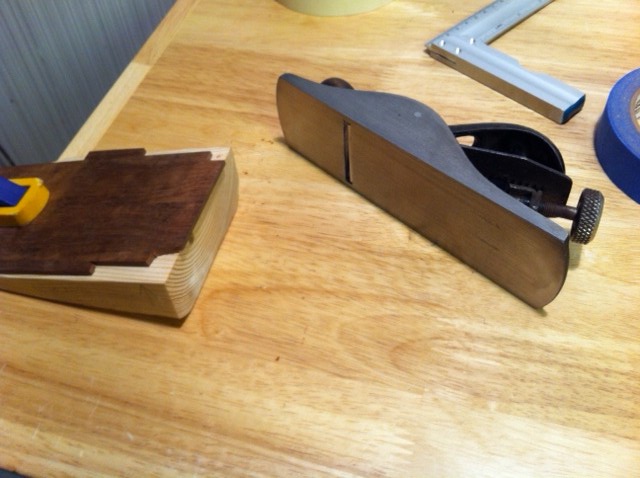
Last night it was time to glue the headplate on the headstock. This part went very smoothly! For everything to look good and fit going forward, it's vitally important that the bookmatch be centered on the headstock and square to the back of the nut. With the neck laminations now covered, first I had to relocate my center line, then clamp the nut and headplate down and draw a line on the plate parallel to the nut. A photo would help explain that; sorry. Then I had to create an angle in the plate end grain (74.5 degrees) so the headplate will perfectly abut the nut. My first attempt was on the disc sander using the pictured block as a base on top of my disc sander "table", but I kept rounding over the corners on that thing, so I decided to try shooting with the block plane. It worked! With a few iterations of shooting and checking alignment with the centerline, everything was square and aligned. It's always fun to make plane shavings. Then it was a simple matter of drilling holes for brads to lock everything in place under clamping pressure, smearing epoxy, and loading up all the clamps again (I may have gotten one or two more on there this time).
The result is quite satisfactory, and now we can see what the side trim will look like.
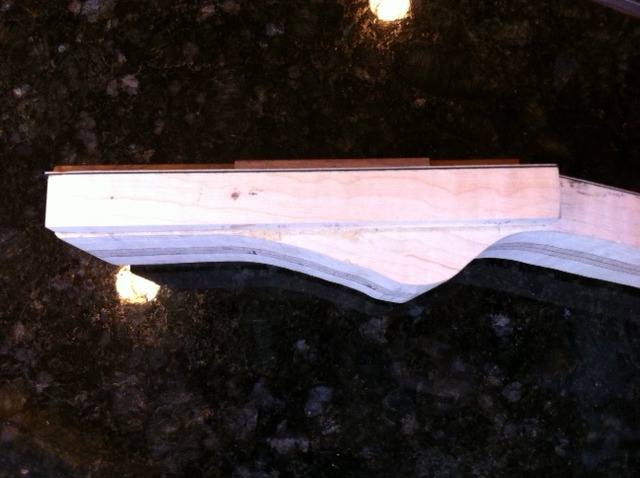
Nick, the the total thickness is right at .790. I unintentionally cut the peghead ears' thickness too close, but we should still be over .780 after planing the back!
(We know I am amazing, but the invisible line is correctly facing up.)
257 views and 2 responses
-
Dec 16 2011, 10:52 AMNicholas Hendrix responded:Dude. Great job! It is looking really cool. This banjo is going to be stunning!
-
Dec 16 2011, 11:28 AMShawn Hoover responded:Naphtha is my friend. And I know you love that handcrafted softwood shooting board.