Peghead drilling R&D, part 2
January 7 2012, 7:32 AM
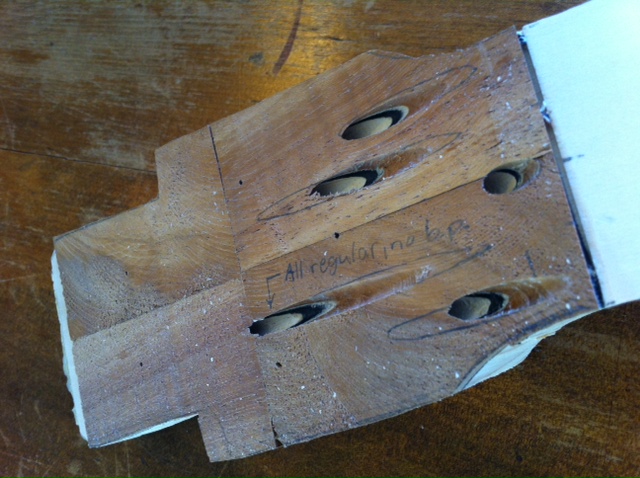
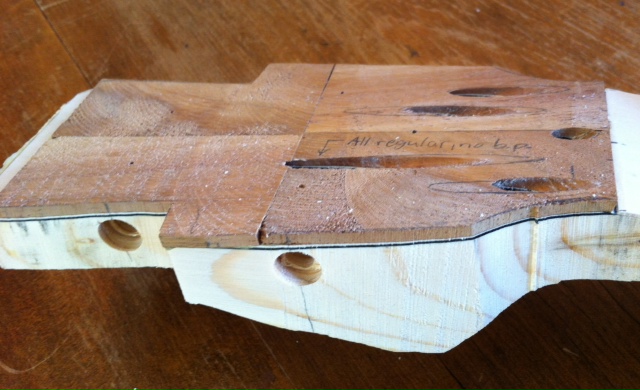
Every angle, distance, and thickness is critical like never before in this project. I'm learning just how critical and (hopefully) how make it work.
A couple holes look great. Don't worry about the far left. First of all, the twisted grain makes the hole hairy. Secondly, the drill bit wasn't hitting the hole depth-wise, and I second-guessed the guide angle and compensated by shifting back. Wrong. The real problem is the fake peghead veneer surface is both unlevel and thinner than the design that determined the drill angles. That's also why there's variation amongst symmetric pairs and surface hole lengths appear shorter than expected. Understanding the prototype's dimensional flaws now, each hole is wrong in the way I expect if the guide is correct. My real peghead is level and thicker, so I expect the same guide and technique to produce results much closer to the ideal (if the peghead angles are the same). The bits heat up and pack chips into the flutes quickly. Fortunately pulling out the bit to clear and reinsert does not seem to cause problems. Instead of drilling the slots and finding out if this all really worked or not, I ended the night playing doctor to remove a chunky pine splinter from under my fingernail. You can get far with denatured alcohol and a wood chisel. I didn't even need the wood glue (though waiting for that to dry would have given me time to finish drilling). We'll find out more next time. Stay tuned.